
Want More Wildlife on Camera? Start Here
- 2 days ago
- 4 min read
What does it actually take to capture a fast-moving animal on a game camera in just a single week? Well, with our expertise I will guide you through this age old question!
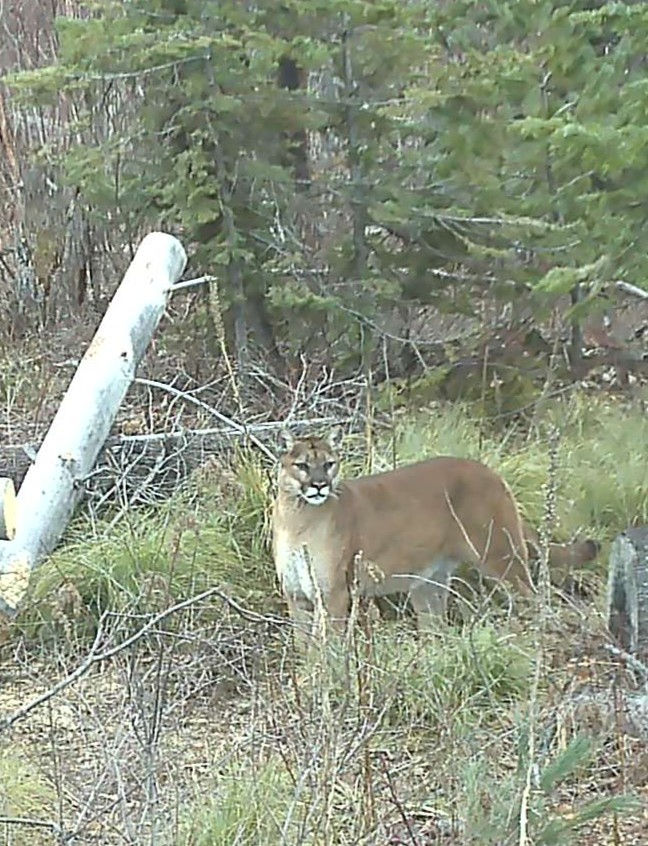
Most people think setting up a game camera is just tying it to a tree and leaving it for a month, but there’s much more to it, if you want to capture some of the best animals your local ecosystem has to offer. When we first started out, using @browningtrailcameras we had no idea what we were doing, but by learning from our mistakes our first ever trail cam capture was a mountain lion mother with her cubs! This proves that with this list of tips, you too can capture all of your target species by getting a head start. Let’s get down to business!
Tip 1: Game Camera Modes & Delays
This is my first and one of the most important things in this discussion, and that’s how to decide which mode and which time delay is best for these situations. But before we dive into this, I’d like to say that it’s important to remember NOT to leave your game camera out at long periods of time. A month or so in the field means that you need to restrict the amount of photos and videos it takes, and if you’re trying to capture the best amounts of wildlife on public land this is a bad idea. I’d recommend 1-2 weeks at a time. That way, you get plenty of time to catch traveling animals, but you can also have it on whatever setting you want for the best photos and videos because it’s unlikely the memory card will fill up or the battery will go dead. Now another important thing to consider is photo or video. It’s up to you but I prefer video, and here’s why.
To capture true wildlife behavior, tracking data, and the direction an animal is traveling, you need video. Set your camera to record short 10-second clips at the highest resolution. This setup not only gives you tons of video time to see where your subject is traveling but also doesn’t fill up the memory card to much because on public land you will definitely film humans and pets. It may sound like you’re ready to go, but there’s still much to learn about how to be successful at trail cams!
Tip 2: camera positioning

This is something very important and one thing a lot of beginners miss.
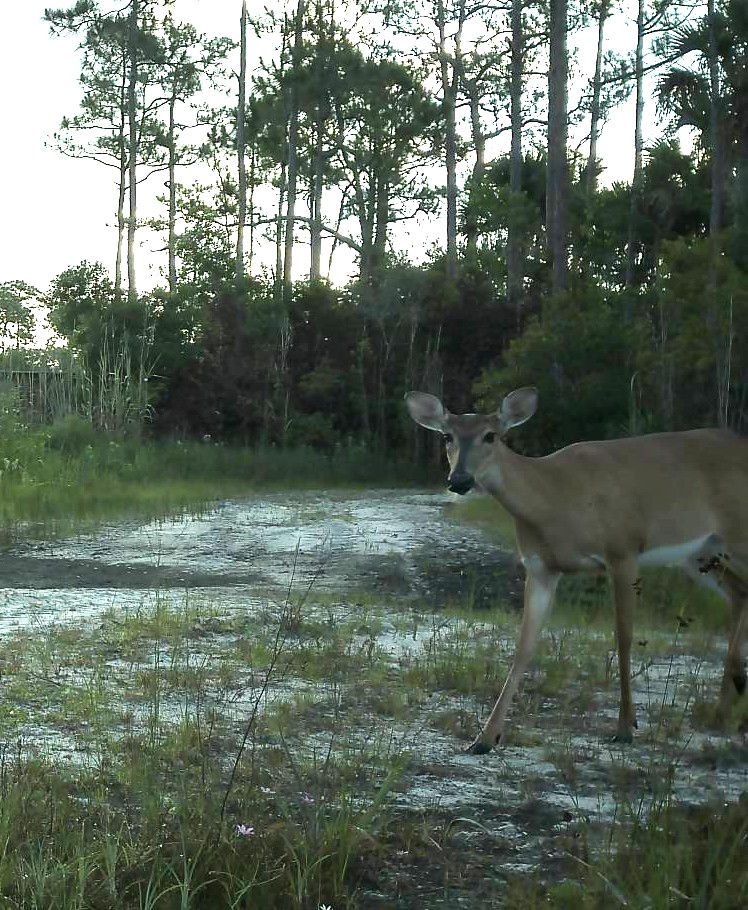
A fast animal will walk past a 90-degree angle before the motion sensor can wake the camera up, leaving you with a blank video or a blurry tail. Always angle the camera at 45 degrees pointing down the path so the animal walks directly toward the lens. This gives the sensor maximum time to trigger. Whether it’s our home territory of Montana and Florida, or somewhere else this is something that’s applicable for all situations involving game cameras! Now, the height of where you put your camera depends on what you’re targeting and the situation you’re in. This is where my next set of advice comes in.
Tip 3: Height breakdown
A lot of people ask what part of the tree should I put it on? Well it really can depend on what you’re targeting, here’s what I’m talking about.
If it’s Florida for example and you’re trying for short bobcats or wild boar it often is a good idea to mount it at the bottom of the tree trunk for a perfect shot. However if you want to capture more of the path or environment or if there’s water nearby it might be smarter to attach it higher, (4-6 feet high). That’s why it always depends. Montana on the other hand is more strict. We always mount it mid level (4-7 feet high) on the trunk to keep it safe from curious bears and elk raking the trees.
Tip 4: concealment
Now like they say, there’s a bad apple in everything and when you setup up your cam, people could steal it. This is how we can keep them safe.
You don't need to worry about sun glare under a thick forest canopy or Cypress swamp. Your biggest concern is people stealing or messing with your gear on public land. Use the Browning camouflage pattern against the tree bark to blend the camera completely out of human sight. I’d even suggest using some branches to cover it a little instead of just setting it up out in the open. But if you over conceal it, your shot will be ruined! That’s why I have my fifth and final tip to make you fully prepared before you set up your trail cam.
Tip 5: clearing the path of your camera.
This is the final step before becoming successful at trail cams!
On a windy day, a single moving branch right in front of the sensor will cause thousands of false triggers. It will completely drain your batteries and fill your memory card with videos of moving grass instead of wildlife, during your 2-week time period. That’s why it’s so important to move any unnecessary branches or anything that might be an issue. So essentially what I’m saying is to conceal it, but don’t over conceal it or you will regret it! Remember that some places (like our home preserve JW Corbett) allow game cams, but you must get a serial number or it WILL be removed by conservation officers.
Well there you have it! These are my top five tips for successfully setting up a game camera! By using these practices you can absolutely catch some of the best wildlife in your local ecosystems! Always remember that it takes a lot of patience but once you’re successful you will fall in love with this outdoor activity! Get out there, explore, and always keep it Wild!

Comments